MAP MAKING
Creating Accurate Civilization2 Maps
by Mercator
There are a lot of maps around on the Internet, but I find the largest part of those maps not really that good. The following three reasons are the most common mistakes:
- An overall lack of accuracy of the landmass/coastlines,
- There are only large areas of the same terrain, or
- The entire map is mostly grassland, interspersed with stupid little patches of plains, forest etc.
Hoping that you agree with me on these points (at least that those are important) and that you find my maps not bad at all, I'll write down how I create most of my maps.
Remember that this is by no means the only way to create Civilization2 maps. Sometimes it is simply impossible to use this method, because you need to have suitable images of the area. Especially when you don't have a scanner (I don't), you will have to find other ways to make your map as accurate as possible.
Getting Started
The first thing you have to do is consider exactly what area you want to appear on your map and how large you want your map to be. Although map size isn't really important for 'leisure maps', this size does certainly matter for 'scenario maps' (beware of the size limits, though). When you want to know more about scenario making, I'm not the person to tell you. You can find guides about that topic in the reference section of my website.
When you thought about the map size and area, the most important step is of course finding an appropriate map. The most obvious place to find a map is your atlas. Although that's possible, I prefer using digital maps I find on the Internet. On my links page I have an extensive list of sites where you can find your maps.
Creating the Map
When you have acquired the appropriate map, you should cut out the area you want to make the Civilization2 map of (unless you make a map of the entire image, of course).
To explain the next parts I will use an example: let's say we want to make a map of Spain. Below you can see what picture we have cut out (part of the 'space view' map of Europe I found at National Geographic's View from Above.
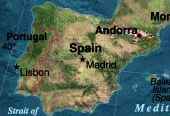
When you have determined what size you want your map to be, you can create a 'grid image' to paste over the original image. Let's say we only want to create a very small map of Spain (a small Civilization2 map [40 x 50] has a surface of 2000, so we'll want our surface to be smaller than that).
The sizes of the original JPEG-image in pixels are 170 x 116. To calculate good sizes for your map you should divide the width of the image by a possible width of the grid image. For the height you should divide twice the height (in this case 232) by that same possible grid-width. Let's start calculating:
| Width | 170/6 = 28.333 |
|---|---|
| Height | 232/6 = 38.667 |
| Surface | 28.333 x 38.667 = 1095.556 |
This is just the size we want. In this case it's hardly possible to make a larger map. Because when you reduce the grid image to sizes smaller than 6, the grid won't be accurate anymore. Of course it is much better to use images that are as large as possible, since this will increase accuracy. For the sake of this document I used a small image, though.
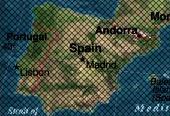
Now we can create a 'grid image' with width and height 6. You can use this standard grid image (50x50 pixels) to start out with.
First you have to change the white to transparent. After that you have to resample it from 50 x 50 to 6 x 6. When you've done that, you can flood fill the first image of Spain with the grid... At the left you can see what the image will look like.
Now you've done that, we have come at the easiest and most boring part...
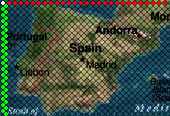
Before the Map Editor comes in, you have to count the actual number of squares determining the width and height of the map. In the image on the left you can see how you have to count it. The first (white) square plus the number of green squares is the height of this map (38). The width of this map is equal to the first (white) square plus the number of red squares (28).
When you have finished counting, you can create the map (set the world shape to flat with a flat map first!!). After that you must determine for each square whether it's land or sea and copy it into the Map Editor, using the Ocean terraintype to represent the ocean squares, and some land terraintype to represent the land.

The map we just made looks like you can see above. It's quite an accurate map although we only used a very small image of Spain.
Because a lot of coastal squares are partly land and partly ocean it's up to your own insights and intuitions to work out details. It's best to test out different possibilities.
The final part in the process of making a good map are the terrains and rivers. I won't go into details in this part, you just have to remember some important things:
- Use as many sources as possible to create the right terrains and rivers (i.e. the image you created the map from, some other climate, vegetation or elevation specific maps of the area as well your atlas at home.)
- Try not to use large areas of the same terraintype. There are some exceptions of course, e.g. the Himalayas (a lot of mountains), the Sahara desert (lots of desert) or Siberia (forest). Another exception is when you have an extremely large map.
To make a landscape look more natural always let different terraintypes 'fade out' into eachother. For example, don't put an area of desert next to an area of grassland, but add a small line of plains in between and add some more loose plains squares around that border. Don't overdo it, though.
This...
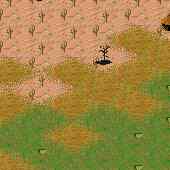
... looks better than this:
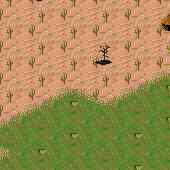
The same goes for Mountains versus flat terrains, so use Hills to 'bridge' the difference. Remember that the larger your map is (more detailed), the bigger the 'fading-zone' should be.
That's it! You can start creating.


